Make Your Own Leather Envelope Wallet
Posted by Laser Tech on
24" x 24" leather scraps.
You can add a button snap, but we are just going to simply glue this envelope together for a quick demonstration. Follow along to make your own wallet to stash your cash, credit cards, business cards or whatever need at the ready.
To complete this project you will need:
- a vector editor such as InkScape, Adobe Illustrator or CorelDRAW
- button snap or glue or thread to form your wallet
- envelope template or paper envelope
- Outfab.com to etch and cut your project
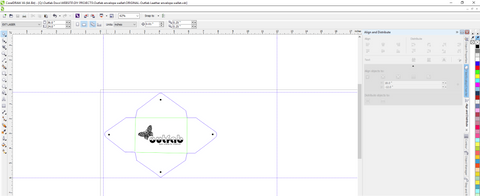
Step 1, File Setup:
Create a .2" margin from page edge. You can use the guides to quickly do this. Please use those guides! It will save you lots of time and money. If your file goes over the .2" margin, your project will likely be cutoff. We will inform you if your project goes over the margin before we except payment and cut your designs. Don't worry!
If you are just making one wallet for yourself, this will fit within a "6 x 12" piece of vegetable tanned leather. Originally, I sized this piece to 6" x 8", but resized to 5.712" x 7.616". to fit this piece of leather. Just don't go over that .2" margin!
Step 2, Designing Your Wallet:
You can easily find envelope templates online or get a paper envelope and carefully take it apart to measure the dimensions. I have included a FREE template for you to download.
You can then precisely scale the envelope to your desired size. We do not scale designs to fit the material so you will have to decide how large or small you want your wallet or clutch bag.
The main design is up to you. You can add initials, your favorite animal, a repeating geometric pattern, a floral design, simple cutouts or whatever you like. Just stick to our laser cutting guidelines and you can do no wrong.
Step 3, Submit Your Design to Outfab.com
It's easy to submit your order and upload your file to Outfab.com. Remember to run your file through our file checker to spot check your file for errors.
If there are any issues we will contact you. If it's smooth sailing, we will cut and ship your order within our current turnaround, which is usually 5-7 business days.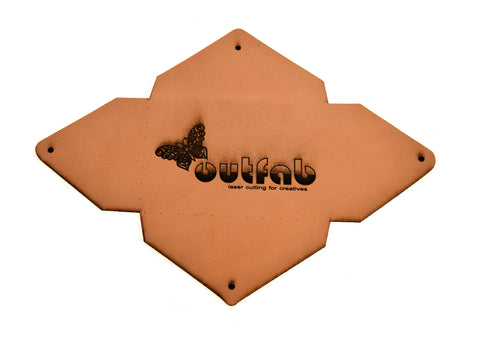
Step 4, Assembly
Once you receive your pieces in the mail, it's time to assemble. Gather your button snap or a leather adhesive and find a well ventilated area and get to work! If using an adhesive, don't forget to use a clamp to firmly hold your leather in place as the glue dries. Wipe any excess glue before you apply the clamp so you don't inadvertently glue the clamp to the wallet. Hey, it happens to the best of us!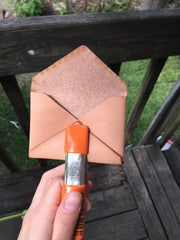
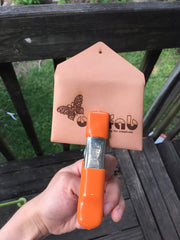
Let your wallet dry overnight before using or if you used a button snap, take your wallet for a test drive. Enjoy!
Share this post
- Tags: accessories, business card holder, DIY, easy, easy project, leather, leather wallet, leather work, margin of error, project, project idea, project ideas, tips, vector, vector graphics, wallet